Introduction
I’m currently working on implementing security controls for USB devices in my organization to increase our security posture. Fortunately for us Device Control in Microsoft Defender for Endpoint (MDE) allows us implement security controls by ensuring that users can only perform specific actions to USB devices such as Read, Write, and Execute. In this article I’ll go through implementing Device Control which allows users to only perform read and write actions to USB devices.
Purpose of Protecting USB Devices
What is the purpose of protecting USB devices? Many people uses USB devices to store images, videos, music, and in some situations cracked version of a paid application. An employee might also find a USB device at the doorstep of the office and decide to plug it into the company device which leads to threat actor gaining initial access to the network.
The whole purpose of protecting USB devices is to prevent scenarios such as these. I understand that many security professionals are in different situations so I would recommend them to analyze their own environment and find a middle ground which allows employees to be productive while being secure. In my situation it was to implement a restriction which allows users to only perform read and write to USB devices.
Reusable Settings
Reusable Settings can be configured through Microsoft Intune. The purpose of it is to allow us to blacklist and whitelist USB devices, CD drives, SD cards, and etc… It can also be used for whitelisting only specific USB brands. In my situation I’ll create a Reusable Settings which targets all USB devices using the RemovableMediaDevices attribute.
-
Go to Microsoft Intune
-
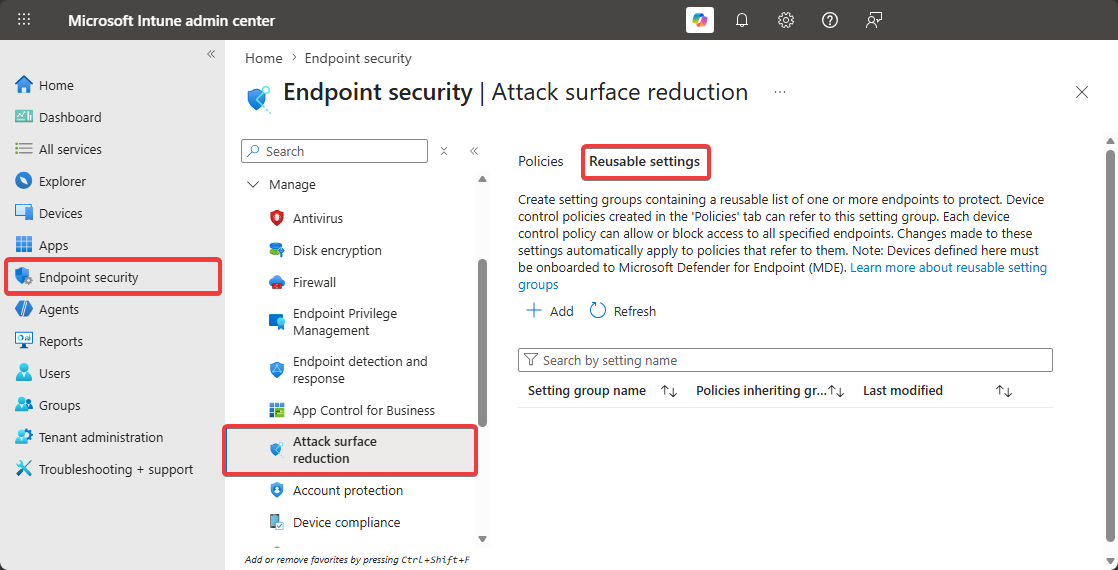
Click on Endpoint Security → Attack Surface Reduction Rules → Reusable Settings.
-
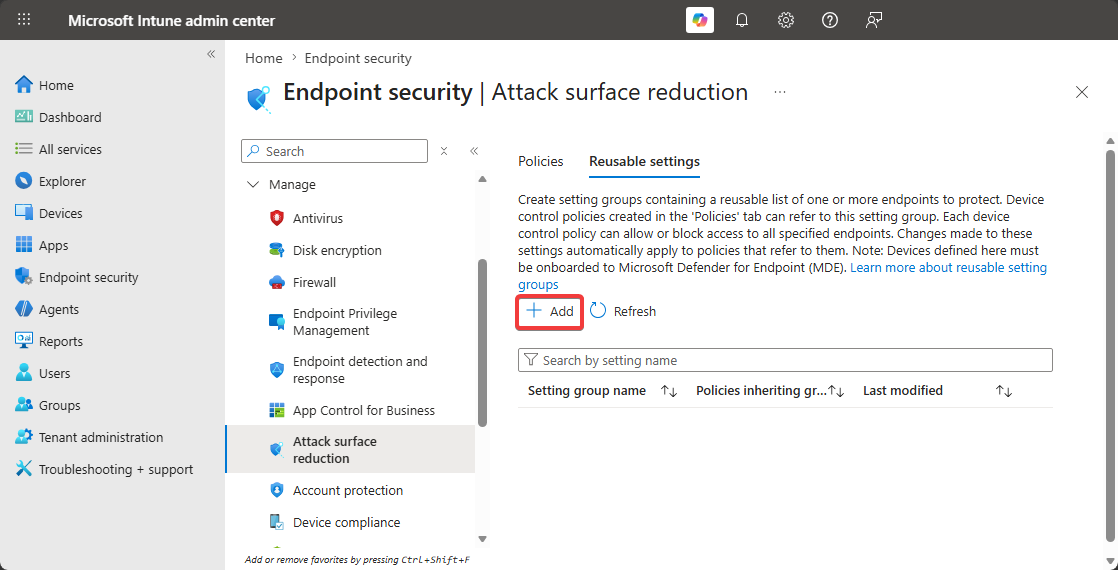
Click on Add.
-
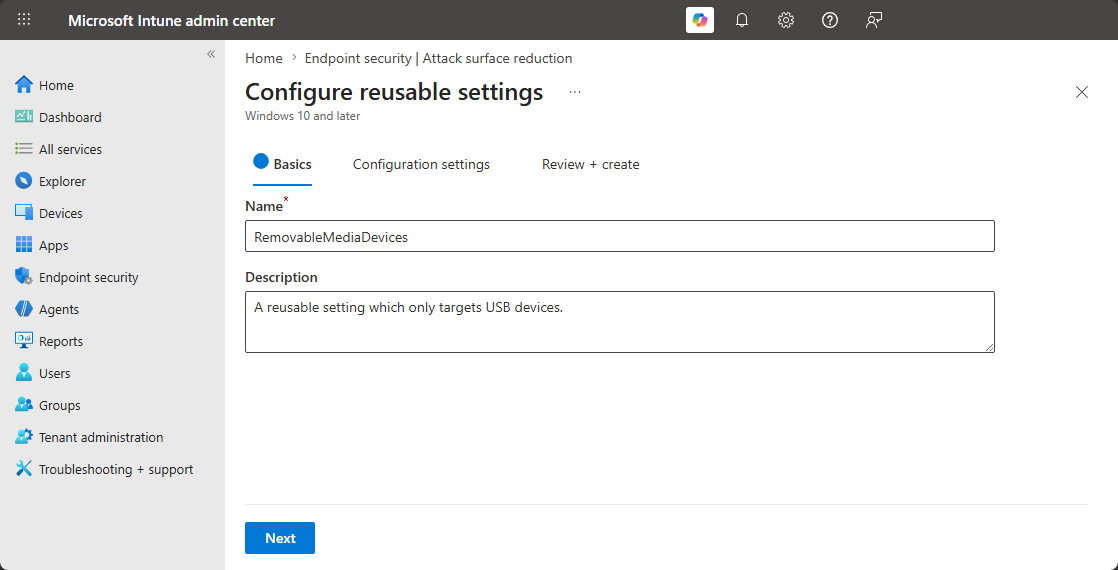
Enter Name and Description.
-
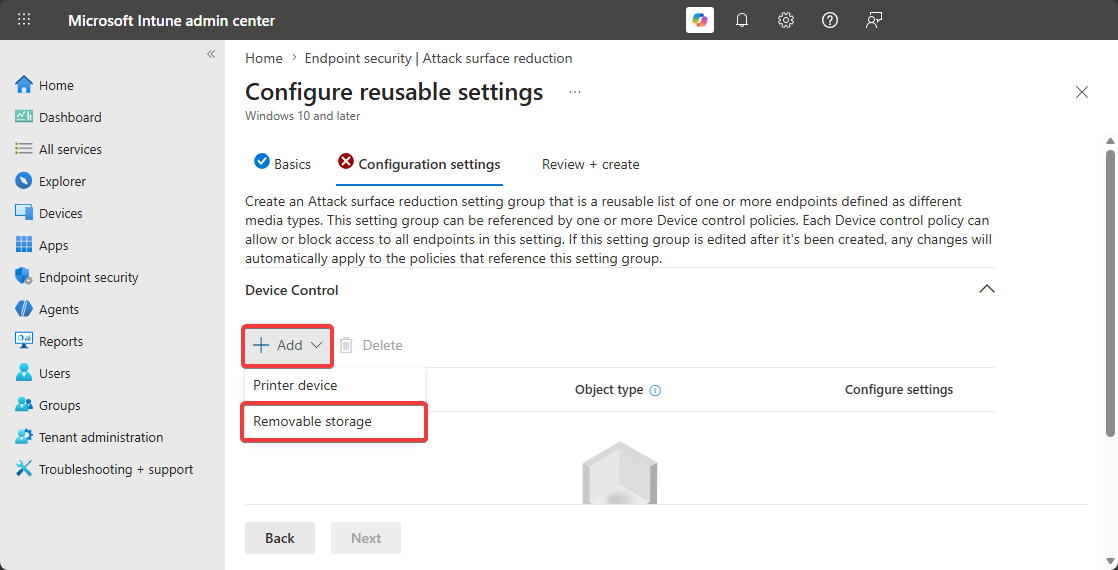
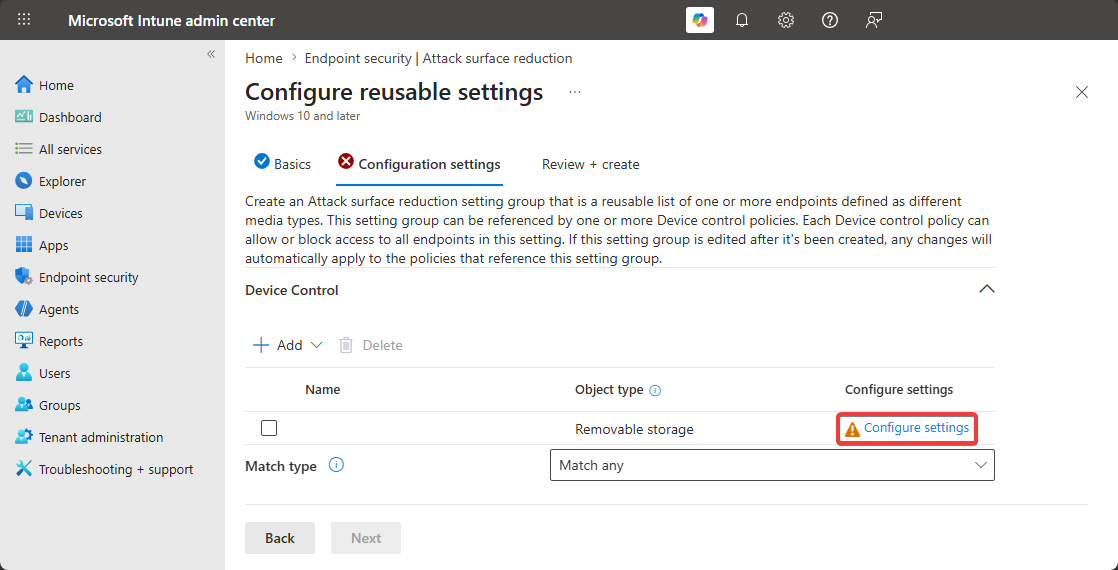
Click on Add → Removable Storage.
-
Click on Configuration.
-
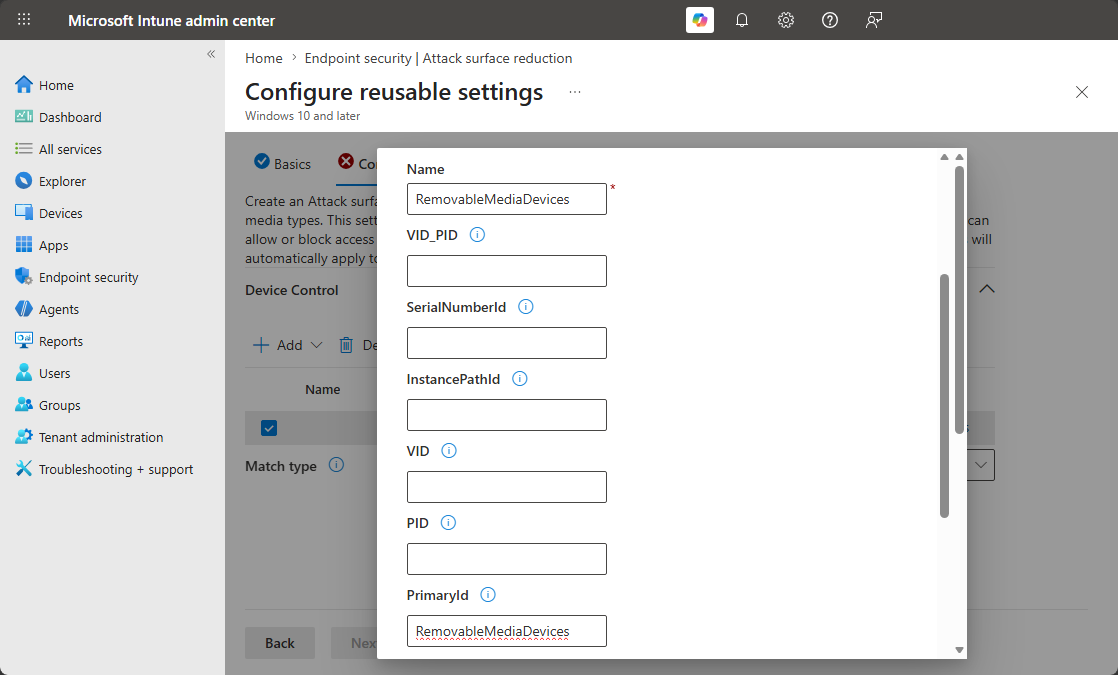
Enter RemovableMediaDevices on both Name and Primary ID.
-
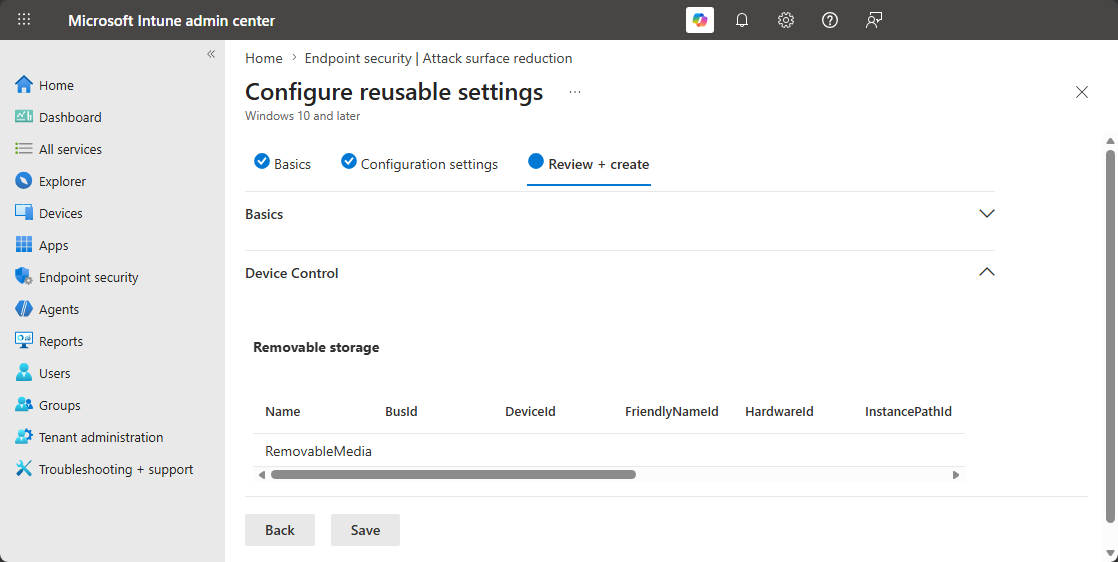
Review the configuration and create the reusable settings.
Device Control
Device Control comes with many capabilities to manage bluetooth, usb devices, sd cards, and much more. In my situation I’ll create a Device Control which specifically targets USB devices using Reusable Settings we made in the previous section.
-
Go to Microsoft Intune
-
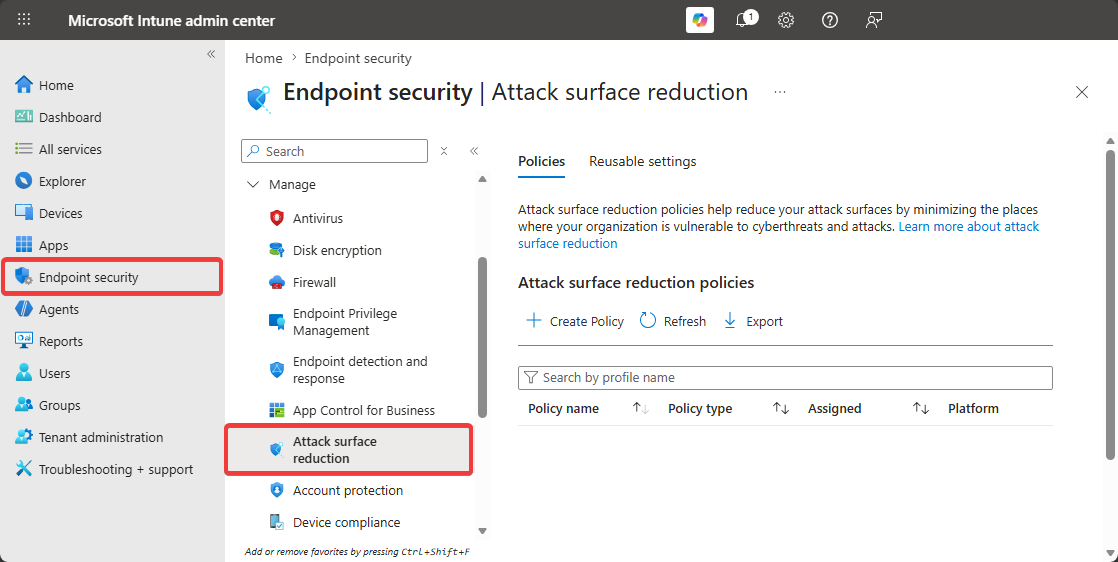
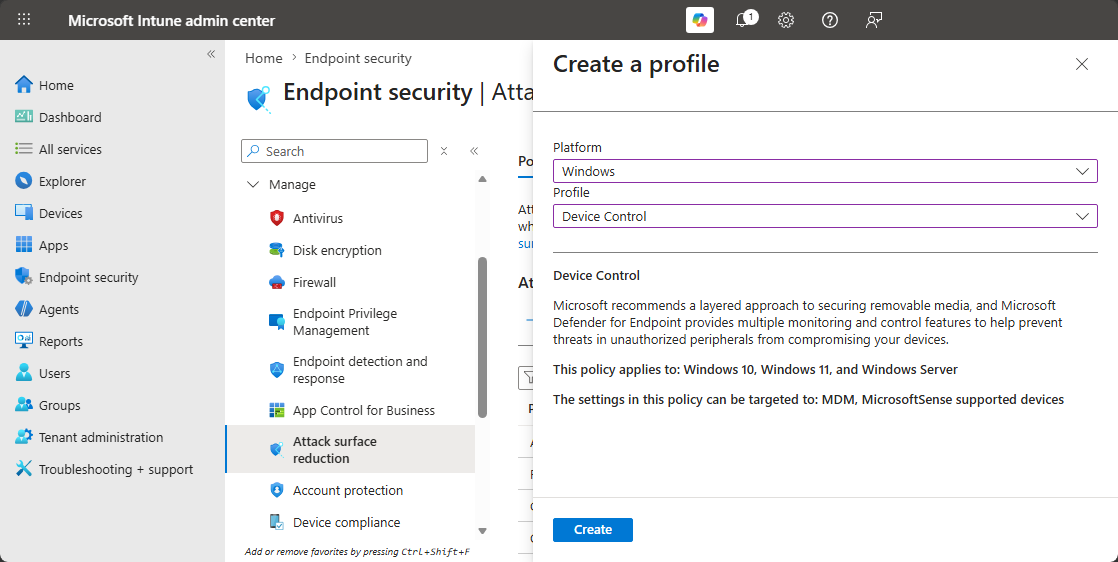
Click on Endpoint Security → Attack Surface Reduction Rules.
-
Click on Create → Platform as Windows → Profile as Device Control.
-
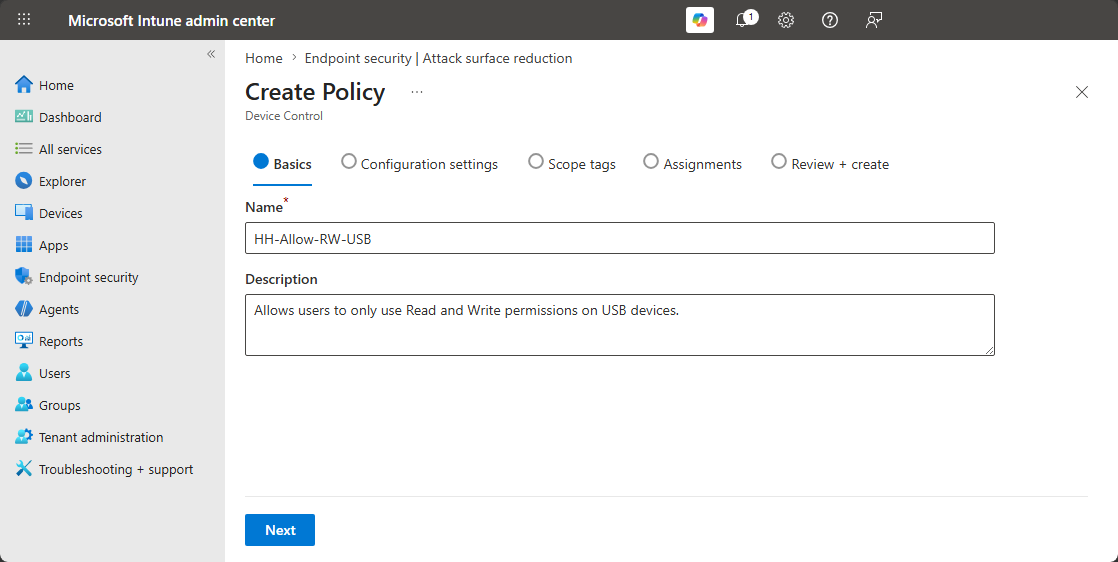
Enter Name and Description.
-
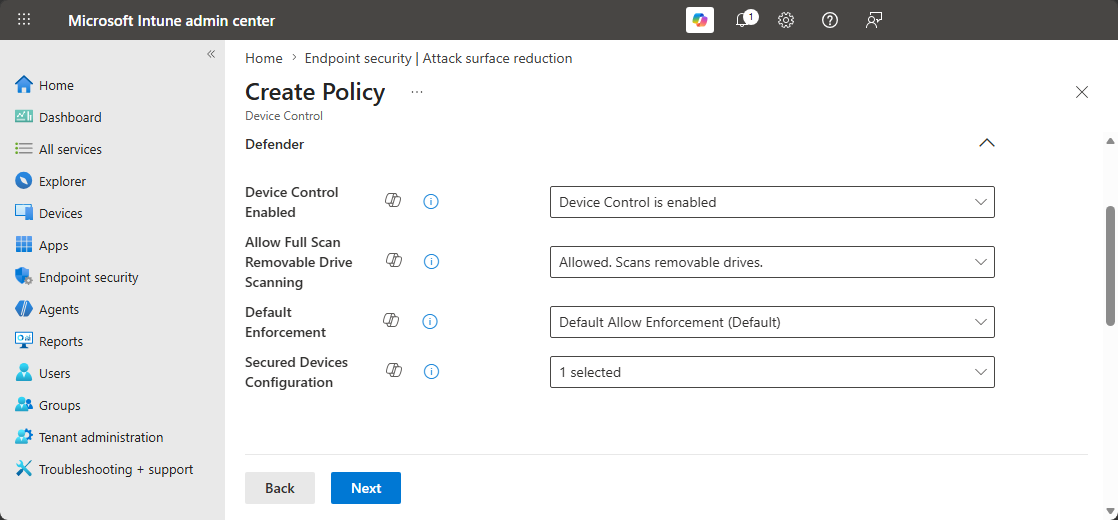
In Defender Section use the following configurations.
-
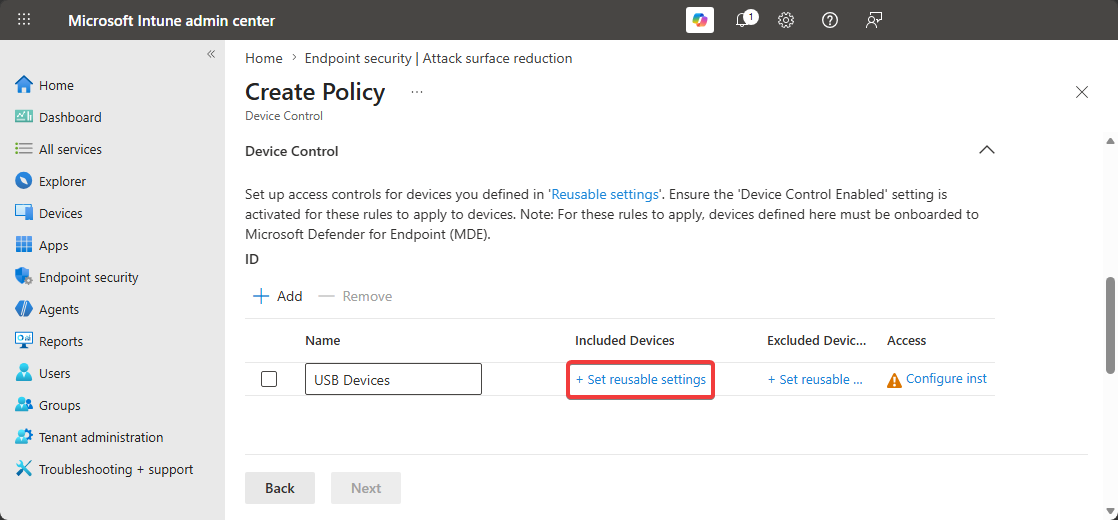
In Device Control Section add the reusable settings by clicking on Set Reusable Settings.
-
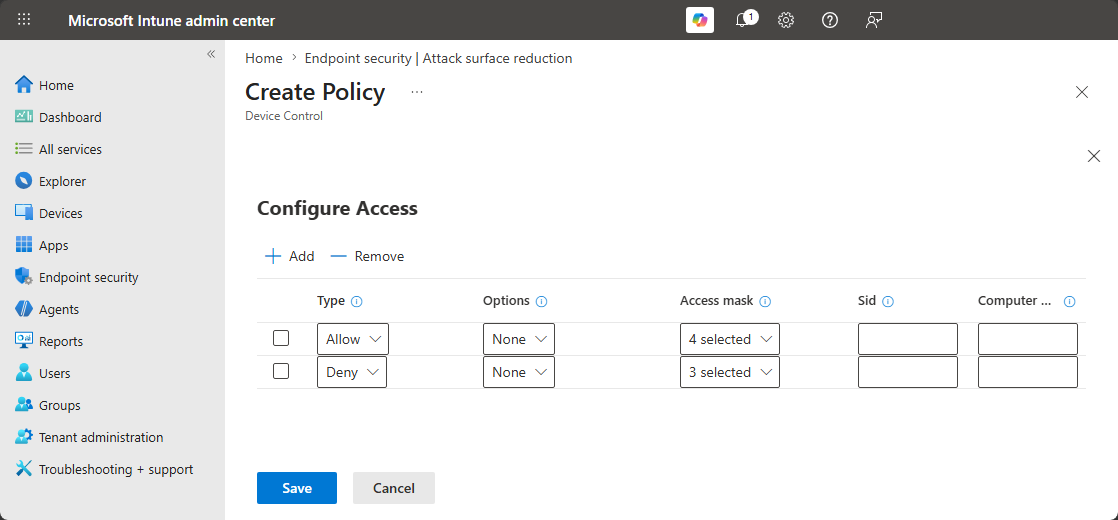
Click on Configure Access and use the following configurations.
Allow: Read, Write, File Read, File WriteDeny: Execute, File Execute, Print
-
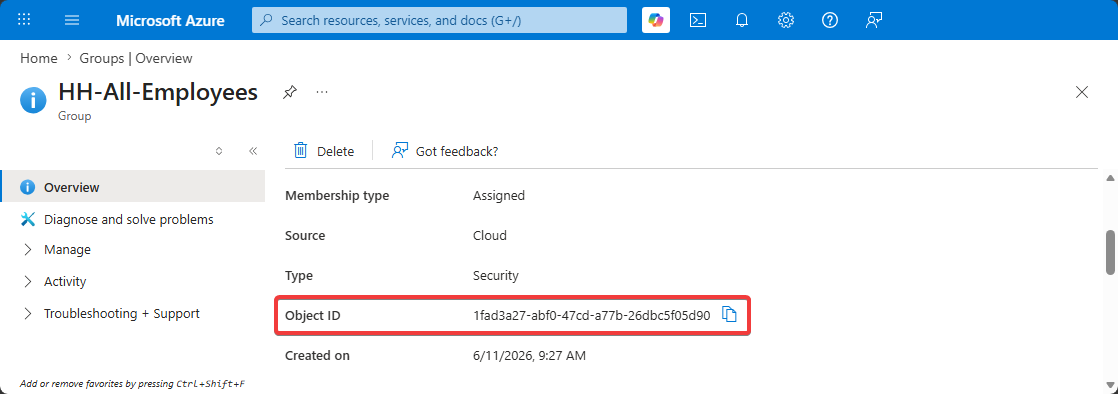
In Microsoft Entra ID copy the Object ID of the group of users/computers to target.
-
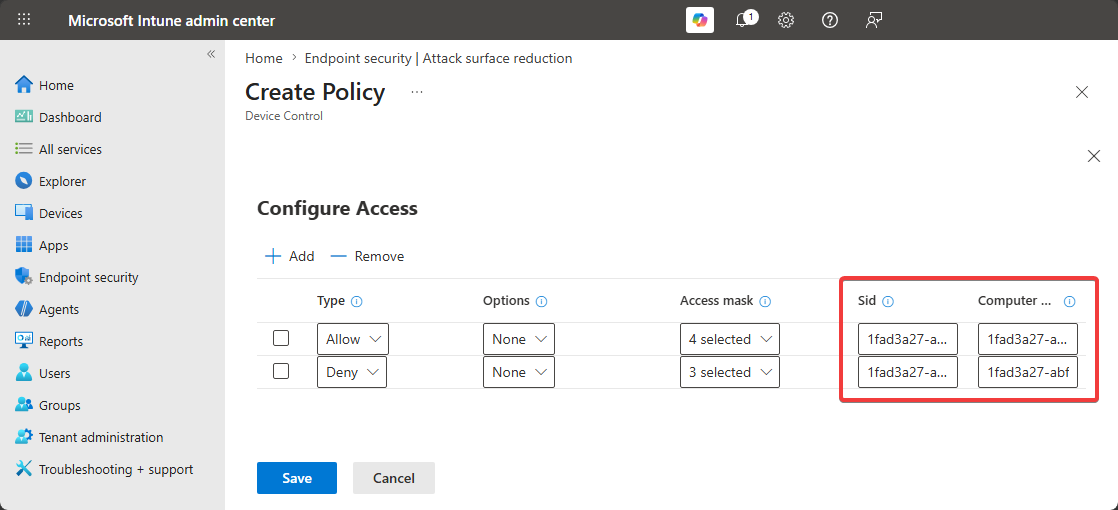
Use the Object ID on the SID and Computer SID
-
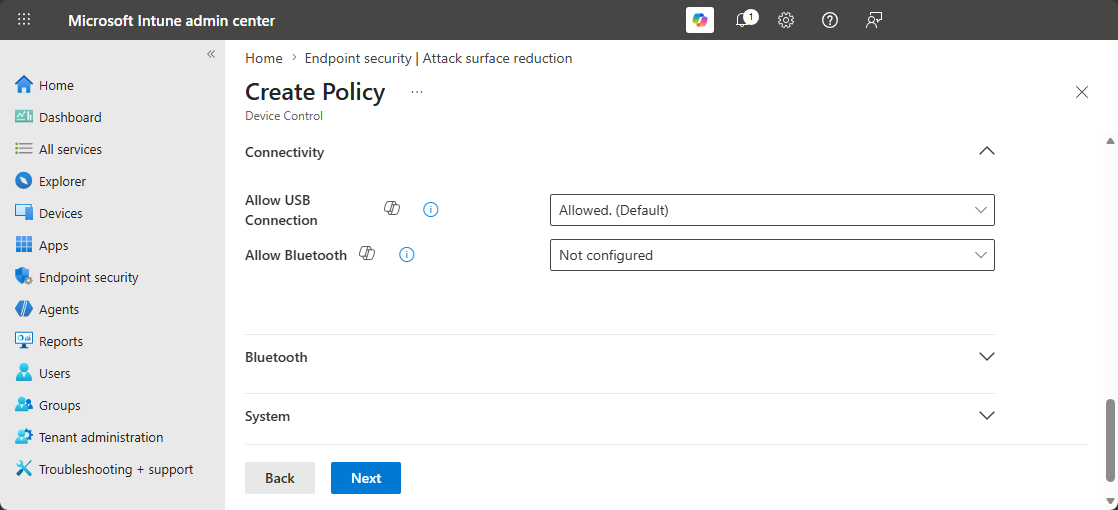
Scroll down to Connectivity and set Allow USB as Enabled.
-
On Assignment select users that should receive the Device Control Policy.
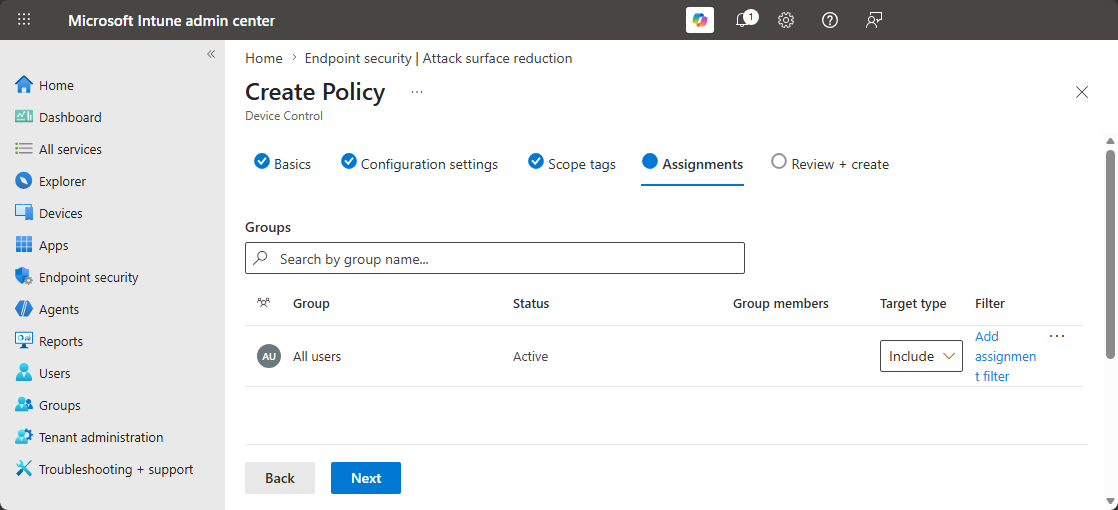
-
Review the configuration and create Device Control policy.
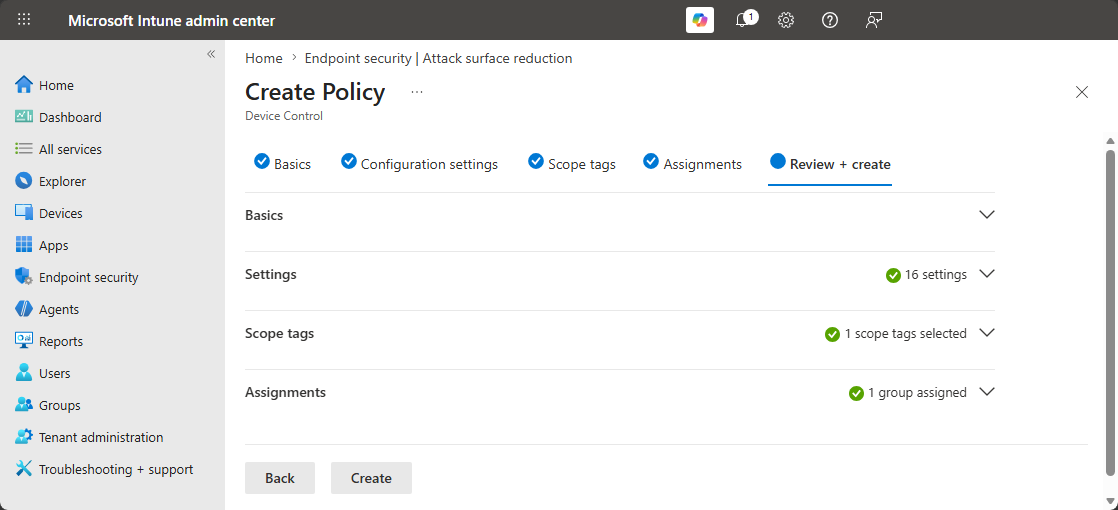
I would recommend starting off the Device Control Policy with some test users instead of deploying it to the whole organization. It’s also important to keep in mind that it might take anywhere from 15 minutes to 1 hour before the policy synchronzies with the device.
Conclusion
Device Control Policy in Microsoft Defender for Ednpoint (MDE) allows us to manage USB devices, CD drives, and SD cards by ensuring that users can only perform specific actions. It allows us to build anywhere from simple configuration to block execute permission to a complex configuration which only allows specific USB brands. If you’re using MDE, I would highly recommend spending some time setting up your Device Control Policy.